Customizing SD card images is the worst—having to boot the device over and over again, and then grabbing the SD card to copy it back to your system, only to repeat it all over again the next time you need to make a change. Bleh.
Beyond that, this causes all kinds of problems in your operations story:
-
How would you reproduce your card image if you lost it?
-
How would you patch, upgrade, or otherwise modify the base image?
-
How do you know what is actually being delivered to customers?
I'm here to tell you that there's a better way! In this article, I'll show you a method for making all the changes you want to your embedded Linux operating system image without any actual hardware, even if the target architecture is different.
Yes, I am serious.
You'll learn how to prepare a
chroot environment that
will allow you to run commands inside your Raspberry Pi image as if you had the
hardware running at your desk. It'll be possible to:
-
Install packages,
-
Customize the boot config,
-
Set up SSH keys,
-
And who knows what else!
The only limit is your imagination, and you can do it all right from the comfort of your computer.
This recipe targets Raspberry Pi because of its ubiquity, but can be adapted to almost any SD card image.
Prerequisites
-
A VirtualBox environment.
-
Vagrant installed.
Set up a Vagrant box
We'll complete the steps in this article inside a Vagrant virtual machine, because when you make mistakes while dealing with filesystem images, chances are, you'll end up with hung devices and needing to reboot often to recover.
Using Vagrant allows us to reboot a virtual machine instead and not disrupt our flow. It also means that you can complete this tutorial on any host machine, running Linux or not.
Create the following Vagrantfile in an empty directory, modifiying the values
for vb.cpus and vb.memory as needed. Be sure to give the box as much oomph
as you can spare, as your computer will get hungry when compressing and
uncompressing the image:
# Vagrantfile
Vagrant.configure("2") do |config|
  config.vm.box = "ubuntu/jammy64"
  config.vm.provider "virtualbox" do |vb|
    vb.cpus = 3
    vb.memory = "4096"
  end
end
With the Vagrantfile in place, start your Vagrant box and log in to it:
vagrant up
vagrant ssh
$ vagrant up
Bringing machine 'default' up with 'virtualbox' provider...
==> default: Importing base box 'ubuntu/jammy64'...
==> default: Matching MAC address for NAT networking...
==> default: Checking if box 'ubuntu/jammy64' version '20230302.0.0' is up to date...

...
...
    default: /vagrant => /home/brett/Projects/examples/card-image-ci
$ vagrant ssh
Welcome to Ubuntu 22.04.2 LTS (GNU/Linux 5.15.0-67-generic x86_64)

 * Documentation:  https://help.ubuntu.com
 * Management:     https://landscape.canonical.com
 * Support:        https://ubuntu.com/advantage
...
vagrant@ubuntu-jammy:~$
Download the image
Go to the Raspberry Pi download page and find one you like. I chose Raspberry Pi OS Lite because the download is much smaller and I can add whatever I like to it. I also chose 64-bit because I have a newer Raspberry Pi.
You can download the exact image I chose by doing the following:
wget --progress=bar:noscroll https://downloads.raspberrypi.org/raspios_lite_armhf/images/raspios_lite_armhf-2023-05-03/2023-05-03-raspios-bullseye-armhf-lite.img.xz
vagrant@ubuntu-jammy:~$ wget --progress=bar:noscroll https://downloads.raspberrypi.org/raspios_lite_armhf/images/raspios_lite_armhf-2023-05-03/2023-05-03-raspios-bullseye-armhf-lite.img.xz
--2023-06-24 02:57:30--  https://downloads.raspberrypi.org/raspios_lite_armhf/images/raspios_lite_armhf-2023-05-03/2023-05-03-raspios-bullseye-armhf-lite.img.xz
Resolving downloads.raspberrypi.org (downloads.raspberrypi.org)... 176.126.240.86, 46.235.230.122, 93.93.135.117, ...
Connecting to downloads.raspberrypi.org (downloads.raspberrypi.org)|176.126.240.86|:443... connected.
HTTP request sent, awaiting response... 200 OK
Length: 381558864 (364M) [application/x-xz]
Saving to: ‘2023-05-03-raspios-bullseye-armhf-lite.img.xz’

2023-05-03-raspios-bullseye-armhf-lite. 100%[=============================================================================>] 363.88M  9.43MB/s    in 43s

2023-06-24 02:58:14 (8.44 MB/s) - ‘2023-05-03-raspios-bullseye-armhf-lite.img.xz’ saved [381558864/381558864]
Set up the filesystem
With the image downloaded, you're ready to prepare the image for access.
Uncompress the image
The first step is to uncompress the image if needed. The Raspberry Pi image
downloaded above is compressed in the .xz format, so you'll need the xz and
unxz commands. These should be pre-installed
on the Vagrant box, but if they are not, they're easy to install:
sudo apt-get install -y xz-utils
Uncompress the image. You can add the -v flag to print the progress in
real-time:
unxz -v 2023-05-03-raspios-bullseye-armhf-lite.img.xz
vagrant@ubuntu-jammy:~$ unxz -v 2023-05-03-raspios-bullseye-armhf-lite.img.xz
2023-05-03-raspios-bullseye-armhf-lite.img.xz (1/1)
  100 %      363.9 MiB / 1876.0 MiB = 0.194    44 MiB/s       0:42
You can tell it's uncompressed because it's now enormous, lol:
du -hs 2023-05-03-raspios-bullseye-armhf-lite.img
vagrant@ubuntu-jammy:~$ du -hs 2023-05-03-raspios-bullseye-armhf-lite.img
1.3G    2023-05-03-raspios-bullseye-armhf-lite.img
Resize the image (optional)
If you're going to customize an OS image, you'll probably hit the existing disk size limit pretty quickly.
Install the amazing
qemu-img utility:
sudo apt-get install -y qemu-utils
Inspect the image to find out what you're working with:
qemu-img info 2023-05-03-raspios-bullseye-armhf-lite.img
vagrant@ubuntu-jammy:~$ qemu-img info 2023-05-03-raspios-bullseye-armhf-lite.img
image: 2023-05-03-raspios-bullseye-armhf-lite.img
file format: raw
virtual size: 1.83 GiB (1967128576 bytes)
disk size: 1.37 GiB
If you wanted to install, let's say, LibreOffice or something, it would need to be quite a bit larger. Let's resize the image file itself:
qemu-img resize 2023-05-03-raspios-bullseye-armhf-lite.img +2G
vagrant@ubuntu-jammy:~$ qemu-img resize -f raw 2023-05-03-raspios-bullseye-armhf-lite.img +2G
Image resized.
But that only resizes the image. You still need to grow the root partition that has all the stuff, and then expand the filesystem to fill the partition.
Let's find out which partition is which:
fdisk -l 2023-05-03-raspios-bullseye-armhf-lite.img
vagrant@ubuntu-jammy:~$ fdisk -l 2023-05-03-raspios-bullseye-armhf-lite.img
Disk 2023-05-03-raspios-bullseye-armhf-lite.img: 3.83 GiB, 4114612224 bytes, 8036352 sectors
Units: sectors of 1 * 512 = 512 bytes
Sector size (logical/physical): 512 bytes / 512 bytes
I/O size (minimum/optimal): 512 bytes / 512 bytes
Disklabel type: dos
Disk identifier: 0x4c4e106f

Device                                      Boot  Start     End Sectors  Size Id Type
2023-05-03-raspios-bullseye-armhf-lite.img1        8192  532479  524288  256M  c W95 FAT32 (LBA)
2023-05-03-raspios-bullseye-armhf-lite.img2      532480 3842047 3309568  1.6G 83 Linux
Looks like the second partition is what we want. Let's use the growpart
command to expand it:
growpart 2023-05-03-raspios-bullseye-armhf-lite.img 2
vagrant@ubuntu-jammy:~$ growpart 2023-05-03-raspios-bullseye-armhf-lite.img 2
CHANGED: partition=2 start=532480 old: size=3309568 end=3842048 new: size=7503839 end=8036319
fdisk will now report the expanded size, which grew from 1.6G to 3.6G, as
expected:
vagrant@ubuntu-jammy:~$ fdisk -l 2023-05-03-raspios-bullseye-armhf-lite.img
Disk 2023-05-03-raspios-bullseye-armhf-lite.img: 3.83 GiB, 4114612224 bytes, 8036352 sectors
Units: sectors of 1 * 512 = 512 bytes
Sector size (logical/physical): 512 bytes / 512 bytes
I/O size (minimum/optimal): 512 bytes / 512 bytes
Disklabel type: dos
Disk identifier: 0x4c4e106f

Device                                      Boot  Start     End Sectors  Size Id Type
2023-05-03-raspios-bullseye-armhf-lite.img1        8192  532479  524288  256M  c W95 FAT32 (LBA)
2023-05-03-raspios-bullseye-armhf-lite.img2      532480 8036318 7503839  3.6G 83 Linux
Later on, after we mount the loopback devices, we'll be able to grow the filesystem to use the newly available space.
Add loopback devices
The next tool you're going to need is the losetup
command, which allows you to manage
loopback devices. We'll use it to create new loopback devices for the card image
partitions and mount them to directories.
In my case, the first available device was /dev/loop6, but your specific
device number may differ whenever this command is called. The losetup command
returns the loopback device path, so we'll assign it to a variable to avoid
referring to it directly:
DEVICE=$(sudo losetup -f --show -P 2023-05-03-raspios-bullseye-armhf-lite.img)
echo $DEVICE
vagrant@ubuntu-jammy:~$ DEVICE=$(sudo losetup -f --show -P 2023-05-03-raspios-bullseye-armhf-lite.img)
vagrant@ubuntu-jammy:~$ echo $DEVICE
/dev/loop6
You can use lsblk to inspect the newly available loopback devices:
sudo lsblk -o name,label,size $DEVICE
vagrant@ubuntu-jammy:~$ sudo lsblk -o name,label,size $DEVICE
NAME      LABEL   SIZE
loop6             3.8G
├─loop6p1 bootfs  256M
└─loop6p2 rootfs  3.6G
bootfs and rootfs are classic Raspberry Pi device labels, so it's looking
like we're in good shape.
If you forget which device you had, run losetup -l to find it again:
losetup -l
vagrant@ubuntu-jammy:~$ losetup -l
NAME       SIZELIMIT OFFSET AUTOCLEAR RO BACK-FILE                                                DIO LOG-SEC
/dev/loop1         0      0         1  1 /var/lib/snapd/snaps/lxd_24322.snap                        0     512
/dev/loop4         0      0         1  1 /var/lib/snapd/snaps/snapd_19457.snap                      0     512
/dev/loop2         0      0         1  1 /var/lib/snapd/snaps/core20_1950.snap                      0     512
/dev/loop0         0      0         1  1 /var/lib/snapd/snaps/core20_1822.snap                      0     512
/dev/loop6         0      0         0  0 /home/vagrant/2023-05-03-raspios-bullseye-armhf-lite.img   0     512
/dev/loop3         0      0         1  1 /var/lib/snapd/snaps/snapd_18357.snap                      0     512
In this case, it's /dev/loop6. Set the $DEVICE variable manually to
continue:
DEVICE=/dev/loop6
Mount partitions
The disk image is ready to be mounted to your local filesystem so that it appears as any other directory would, except that it will be the root filesystem of your Raspberry Pi image. Let's go!
You'll want to mirror the final filesystem layout as much as possible. That
means opening up the root filesystem, finding /etc/fstab, and seeing what it
has first.
Create the rootfs directory:
mkdir -p rootfs
Mount the rootfs partition onto the rootfs/ directory:
sudo mount ${DEVICE}p2 rootfs/
You should now be able to inspect the filesystem:
ls rootfs/
vagrant@ubuntu-jammy:~$ ls rootfs/
bin  boot  dev  etc  home  lib  lost+found  media  mnt  opt  proc  root  run  sbin  srv  sys  tmp  usr  var
From there, you can discover the /etc/fstab file:
cat rootfs/etc/fstab
vagrant@ubuntu-jammy:~$ cat rootfs/etc/fstab
proc            /proc           proc    defaults          0       0
PARTUUID=4c4e106f-01  /boot           vfat    defaults          0       2
PARTUUID=4c4e106f-02  /               ext4    defaults,noatime  0       1
This is promising! All we're missing are the contents of the rootfs/boot/ directory,
which we might have guessed because the bootfs partition hasn't been mounted
yet. Easy peasy—there's even already an empty rootfs/boot/ directory waiting for
us, which we can make sure by doing the following:
ls rootfs/boot/
vagrant@ubuntu-jammy:~$ ls rootfs/boot/
vagrant@ubuntu-jammy:~$
So let's mount the bootfs partition there:
sudo mount ${DEVICE}p1 rootfs/boot/
All the fun Raspberry Pi stuff is there now:
vagrant@ubuntu-jammy:~$ ls rootfs/boot/
COPYING.linux           bcm2708-rpi-zero.dtb      bcm2710-rpi-zero-2-w.dtb  bootcode.bin  fixup4x.dat   kernel7l.img  start4x.elf
LICENCE.broadcom        bcm2709-rpi-2-b.dtb       bcm2710-rpi-zero-2.dtb    cmdline.txt   fixup_cd.dat  kernel8.img   start_cd.elf
bcm2708-rpi-b-plus.dtb  bcm2709-rpi-cm2.dtb       bcm2711-rpi-4-b.dtb       config.txt    fixup_db.dat  overlays      start_db.elf
bcm2708-rpi-b-rev1.dtb  bcm2710-rpi-2-b.dtb       bcm2711-rpi-400.dtb       fixup.dat     fixup_x.dat   start.elf     start_x.elf
bcm2708-rpi-b.dtb       bcm2710-rpi-3-b-plus.dtb  bcm2711-rpi-cm4-io.dtb    fixup4.dat    issue.txt     start4.elf
bcm2708-rpi-cm.dtb      bcm2710-rpi-3-b.dtb       bcm2711-rpi-cm4.dtb       fixup4cd.dat  kernel.img    start4cd.elf
bcm2708-rpi-zero-w.dtb  bcm2710-rpi-cm3.dtb       bcm2711-rpi-cm4s.dtb      fixup4db.dat  kernel7.img   start4db.elf
Mount special host filesystems
Some commands you'll want to run, like those for installing packages, enabling
services, or even connecting to the Internet, may require /dev, /proc, and
/sys
filesystems
to be mounted inside the rootfs/ directory. They should currently be empty,
except for rootfs/dev/:
ls rootfs/sys/
ls rootfs/proc/
ls rootfs/dev/
vagrant@ubuntu-jammy:~$ ls rootfs/sys/
vagrant@ubuntu-jammy:~$ ls rootfs/proc/
vagrant@ubuntu-jammy:~$ ls rootfs/dev/
console  fd  full  null  ptmx  pts  random  shm  stderr  stdin  stdout  tty  urandom  zero
Once you've confirmed those directories exist and are empty, mount the filesystems by doing the following:
sudo mount -t proc /proc rootfs/proc/
sudo mount --bind /sys rootfs/sys/
sudo mount --bind /dev rootfs/dev/
Now those directories will be populated with a ton of magic stuff:
vagrant@ubuntu-jammy:~$ ls rootfs/sys/
block  bus  class  dev  devices  firmware  fs  hypervisor  kernel  module  power
vagrant@ubuntu-jammy:~$ ls rootfs/proc/
1     112   131   175  221  32   408  645  852  98          diskstats      kallsyms     misc          slabinfo       version_signature
10    1131  14    18   24   33   409  646  853  99          dma            kcore        modules       softirqs       vmallocinfo
102   1132  15    187  25   34   410  649  86   acpi        driver         key-users    mounts        stat           vmstat
...
vagrant@ubuntu-jammy:~$ ls rootfs/dev/
autofs           fd            loop3    port    shm       tty15  tty28  tty40  tty53  tty9    ttyS20  ttyS5      vcs3   vcsu3
block            full          loop3p1  ppp     snapshot  tty16  tty29  tty41  tty54  ttyS0   ttyS21  ttyS6      vcs4   vcsu4
bsg              fuse          loop3p2  psaux   snd       tty17  tty3   tty42  tty55  ttyS1   ttyS22  ttyS7      vcs5   vcsu5
...
Enable ARM virtualization
At this point, we're almost ready to chroot into the environment. If we tried
to use the Pi filesystem right now, we'd discover that none of the commands work:
./rootfs/bin/bash
vagrant@ubuntu-jammy:~$ ./rootfs/bin/bash
-bash: ./rootfs/bin/bash: cannot execute binary file: Exec format error
That's because the Raspberry Pi is an ARM platform, and our machine is x86-64.
That's okay though. We can add qemu-user-static to the filesystem so that
ARM binaries run via QEMU when executed on our system:
sudo apt-get install -y qemu-user-static
If we run the ARM bash command again, we'll get... a different error!
vagrant@ubuntu-jammy:~$ ./rootfs/bin/bash
arm-binfmt-P: Could not open '/lib/ld-linux-armhf.so.3': No such file or directory
That's good. This error is different and expected because the bash binary is
dynamically linked and has no way of linking to its nice ARM friends right now.
We'll fix that next, when we finally chroot into our system.
Access the filesystem
It's the moment you've been waiting for. Let's run our fake Raspberry Pi!
You can "log in" to your filesystem with chroot, which will start an instance
of the default shell:
sudo chroot rootfs/
$ sudo chroot rootfs/
root@ubuntu-jammy:/#
Wow, so cool! I can go home sweet home!
root@ubuntu-jammy:/# cd
root@ubuntu-jammy:~# ls
root@ubuntu-jammy:~# pwd
/root
I can more or less use it as though it were my machine. Give it a try.
You can run
raspi-config, because
why not:
raspi-config
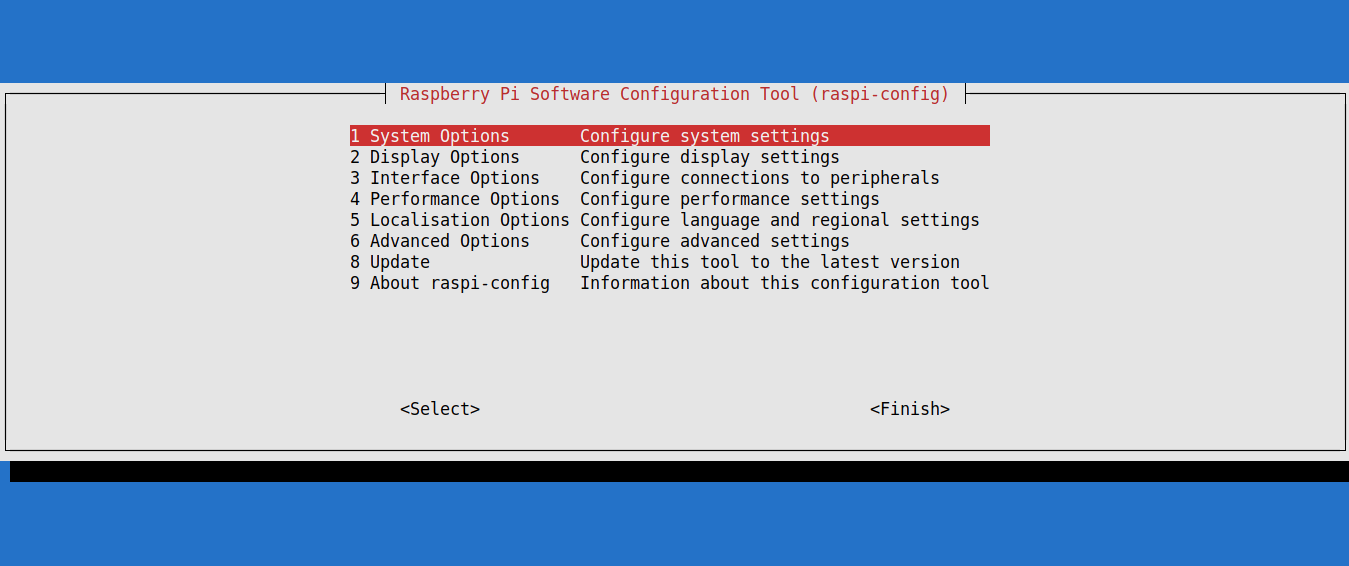
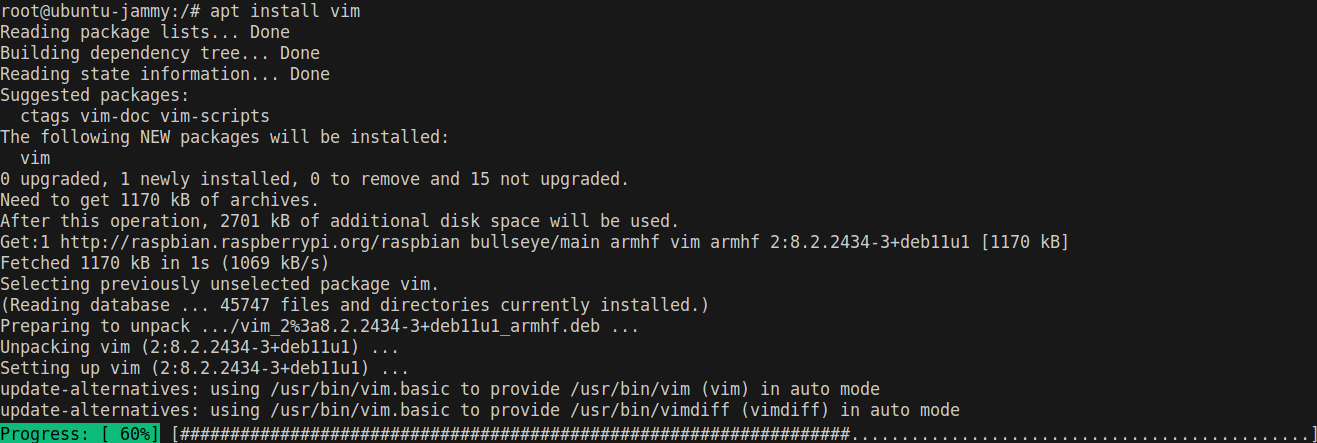
raspi-config on my "Raspberry Pi".You can install vim, because it's everyone's favorite code editor, right?
apt-get update -y
apt-get install -y vim
vim on my "Raspberry Pi".You can edit the hostname:
echo "my-cool-computer" > /etc/hostname
cat /etc/hostname
root@ubuntu-jammy:/# cat /etc/hostname
old-hostname
root@ubuntu-jammy:/# echo "my-cool-computer" > /etc/hostname
root@ubuntu-jammy:/# cat /etc/hostname
my-cool-computer
We can exit the chroot environment with exit:
exit
root@ubuntu-jammy:/# exit
exit
vagrant@ubuntu-jammy:~$
Pretty much anything that you could configure on the actual device can now be configured beforehand without the need to set up any hardware, which is pretty great.
It doesn't stop at hand edits either. You can pipe scripts into the chroot
environment, if you have a set of tasks that you need to run often:
echo "ls /etc" | sudo chroot rootfs/ bash -
vagrant@ubuntu-jammy:~$ echo "ls -1 /etc" | sudo chroot rootfs/ bash -
NetworkManager
X11
adduser.conf
alternatives
apparmor.d
...
Or you can get even fancier. Ansible, for example, has a chroot connection
plugin,
so you can run Ansible playbooks to configure your Pi filesystem—again, without
the need for actual hardware.
Anyway, let's assume we've set everything up the way we want. Yay! But we're not done yet. This filesystem won't do us any good until we repack it to be actually copied onto a real SD card. That comes next.
Tear down the filesystem
We now need to repeat everything we just did, but in the reverse order to get back to a packed-up, ready-to-ship card image.
Unmount filesystems
Unmount all the special filesystems we mounted:
sudo umount rootfs/dev/
sudo umount rootfs/sys/
sudo umount rootfs/proc/
Unmount the loopback devices for the bootfs and rootfs partitions:
sudo umount rootfs/boot/
sudo umount rootfs/
Delete loopback devices
Use losetup to detach the loopback devices that you created earlier to sever
the final link between your disk image and your host operating system:
sudo losetup -d $DEVICE
Compress the image
Now that everything is disconnected, you can repack the SD card image with xz.
This might take a significant amount of time, during which time your computer
will purr like an angry kitten. Be patient, and add the -v flag if you like
having literally any feedback on what's happening:
xz -v 2023-05-03-raspios-bullseye-armhf-lite.img
vagrant@ubuntu-jammy:~$ xz -v 2023-05-03-raspios-bullseye-armhf-lite.img
2023-05-03-raspios-bullseye-armhf-lite.img (1/1)
  0.8 %         26.3 MiB / 32.3 MiB = 0.815   3.2 MiB/s       0:10
Eventually, it should finish. And then, huzzah! Look, our 3.6G image is compressed to 421MB:
du -hs 2023-05-03-raspios-bullseye-armhf-lite.img.xz
vagrant@ubuntu-jammy:~$ du -hs 2023-05-03-raspios-bullseye-armhf-lite.img.xz
421M    2023-05-03-raspios-bullseye-armhf-lite.img.xz
Ship it!
Your disk image is now in the exact same state that it was in when you downloaded it, except that it's actually not. The filesystem is now much larger and has all your super cool modifications ready to deploy to devices anywhere in the world.
Upload it to your FTP server, post it on USENET, or even put it on an actual physical SD card. Whatever you do, don't keep it to yourself, because the world needs your custom distribution of Sonic Pi, or whatever it was that you needed to customize your Pi image for.
Cleanup
If you want to save the card image you created, move it into the /vagrant/
directory. It will then be in the same directory as your Vagrantfile:
mv *.xz /vagrant/
Then exit the vagrant ssh session:
exit
vagrant@ubuntu-jammy:~$ exit
exit
$
Finally, destroy the box you created:
vagrant destroy
Conclusion
The tools and techniques discussed in this article are generally applicable to all kinds of embedded Linux disk images, not just Raspberry Pi. Once you know the filesystem layout, anything is possible!
You can even take all these instructions and dump them into a CI pipeline so that you never have to do this ever again!
Happy coding!